
Why We Offset the Hitting Area in Golf Simulator Installations

One of the most common challenges when designing a home golf simulator is making the most of a room that isn't quite wide enough. At Birdie Builds, we install golf simulators in all types of spaces, but garages are by far the most common. Many garages are under 12 feet wide, which can make it difficult for both right- and left-handed golfers to swing comfortably from the center of the screen.
The solution? Offset the hitting position.
When done correctly, offsetting the hitting zone creates a safer, more comfortable, and more realistic golf simulator experience. However, there are a few critical design considerations that many DIY installers overlook.
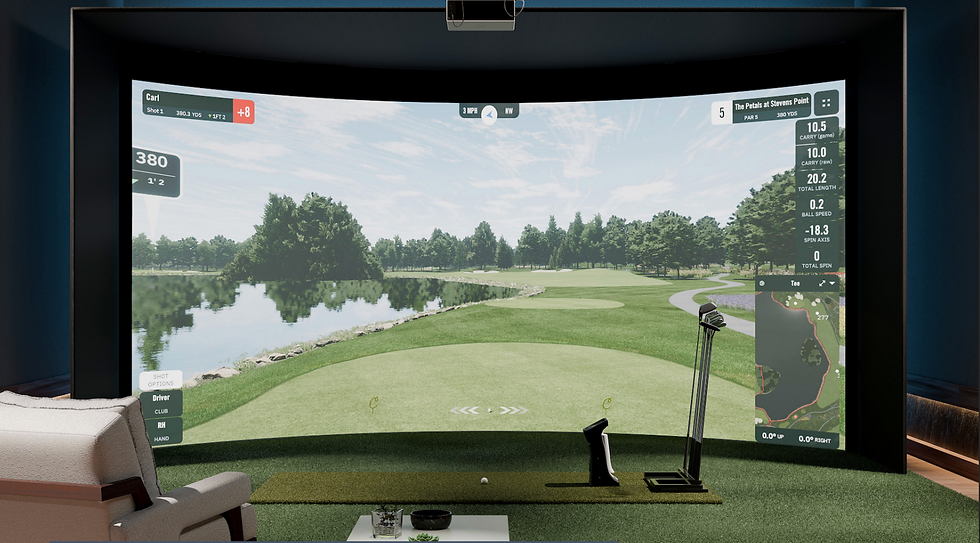
What Does It Mean to Offset the Hitting Area?
Instead of hitting from the exact center of the impact screen, the golfer moves slightly to the left or right. This provides additional swing clearance for the golfer and helps maximize usable space in narrower rooms.
At Birdie Builds, we typically offset the hitting position anywhere from a few inches up to 18 inches, depending on the room dimensions and whether the simulator is designed for right-handed golfers, left-handed golfers, or both.
This is especially common in garage golf simulator installations where maximizing every inch of available space makes a huge difference.
Why Offset the Hitting Position?
Offsetting the golfer can provide several important benefits:
· More room for a full swing
· Better club clearance from walls
· Improved comfort for taller golfers
· Allows narrower rooms to become functional simulator spaces
· Makes garages under 12 feet wide much more usable
Rather than forcing golfers into an uncomfortable setup, offsetting lets us build a simulator that feels natural while maintaining excellent ball flight and launch monitor performance.
The Biggest Mistake: Forgetting to Offset the Projector
This is by far the biggest mistake we see in DIY golf simulator builds.
Many homeowners correctly move the hitting position but leave the projector mounted in the center of the room.
The problem?
The projector now sits directly in the golfer's swing path.
Not only does this create an annoying shadow across the screen, but it also puts an expensive projector at serious risk of being struck by a golf club during the backswing or follow-through.
A projector mount should always be planned around the actual hitting location—not simply centered on the room.
When we offset a golfer, we offset the projector by the same amount so it remains directly aligned with the hitting zone while staying safely outside the swing path.
Choosing the Right Golf Simulator Projector
Once you move the projector off center, you'll need a projector capable of correcting the image.
This is where projector selection becomes extremely important.
Most premium golf simulator projectors include features such as:
· Corner Fit adjustment
· Keystone correction
· Digital image alignment
· Lens shift (on certain models)
These features allow us to perfectly square the image even when the projector isn't centered in front of the screen.
Without these adjustments, you may struggle to fill the impact screen properly or end up with a distorted image.
That's why we recommend choosing a projector specifically designed for golf simulator applications whenever an offset installation is required.
Software Makes Offsetting Easy
Another concern homeowners often have is aiming.
"If I'm hitting from the side, won't my ball always appear to start offline?"
Fortunately, modern simulator software solves this.
Both GSPro and Trackman allow you to adjust the hitting position within the software so the virtual target aligns with your physical hitting location.
This means you can comfortably stand several inches—or even up to 18 inches—off center while still hitting directly down the center of the virtual fairway.
The result is a simulator that feels completely natural despite the physical offset.
Every Inch Matters
One of the biggest differences between a professionally designed golf simulator and a DIY installation is understanding how every component works together.
Moving the hitting strip may seem simple, but it also affects:
· Projector placement
· Ceiling mount location
· Image alignment
· Launch monitor positioning
· Software configuration
· Swing safety
A properly designed offset installation feels seamless. An improperly planned one can create safety issues, shadows, distorted images, and expensive repairs.
Let Birdie Builds Design Your Space
At Birdie Builds, we specialize in designing custom golf simulators that maximize every inch of available space. Whether your room is 10 feet wide or 20 feet wide, we'll determine the ideal hitting position, projector location, launch monitor placement, and software configuration to create a simulator that performs like a commercial installation.
If you're planning a garage golf simulator or have a narrow room, don't assume you have to compromise. With the right design, an offset hitting area can dramatically improve safety, comfort, and performance while delivering an immersive golfing experience.


Comments